
Pen and Ink Building Illustrations
Steps of a Custom Ink Drawing
The images and text below outline the basic steps in my custom pen and ink illustration process. To see my online portfolio, prices and terms, please visit my custom pen and ink page.
Pen and Ink House Portraits
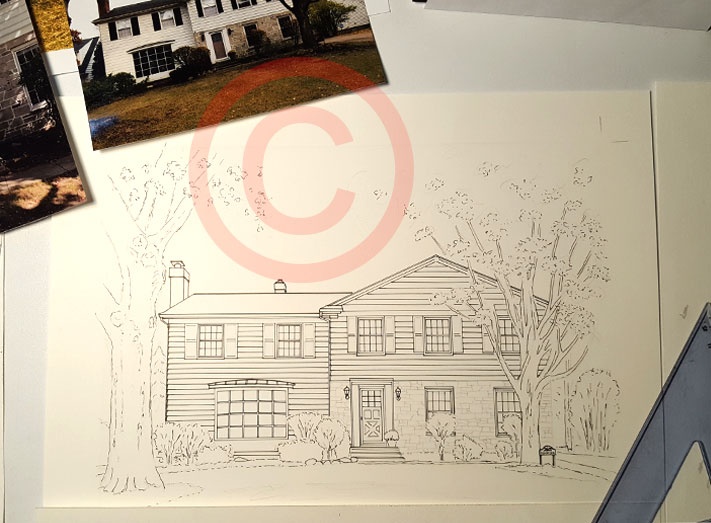
Step 1: Create a basic pencil sketch of the building, landscaping
 The first step in my process to create a pen/ink portrait is a basic line sketch of elements. At this stage the house/home is sketched in place, along with appropriate landscaping.
This sketch is sent to the client for approval before the final pen & ink rendering work begins. The client may request minor changes, such as removing a flag pole, trimming bushes, etc.
Step 2: Transfer the approved line sketch to the archival paper
 The second step in my process is to transfer the approved pencil sketch to the archival drawing paper, using ink to indicate the primary lines of the building and landscaping.
Step 3: Begin rendering the details in ink
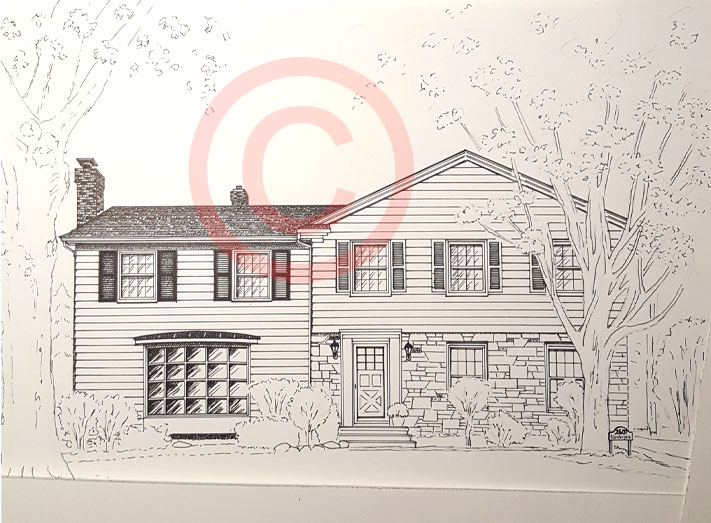 The bulk of my drawing time is applied to the detail work on the drawing. I begin slowly building up areas of the portrait, giving careful consideration to what needs to be darkest/lightest in order ot make the drawing pop.
Step 4: Build in the details
 Details are added gradually, so as not to overwork the drawing.
Step 5: Finalize the details
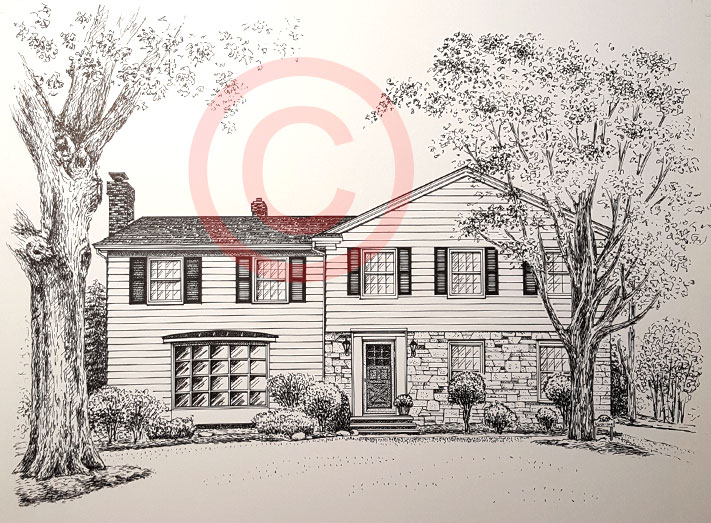 More and more shading is added, continuing with care so as not to make any area too heavy in ink, as that would unbalance the final art. As I approach a completed rendering, I generally set the drawing aside for several days before finishing the work. I find it helps to look at the piece with fresh eyes, again, as a way to avoid overworking the portrait. (Overworking refers to too much shading, which creates a flat or muddy appearance.)

Step 6: Double-mat and finish!
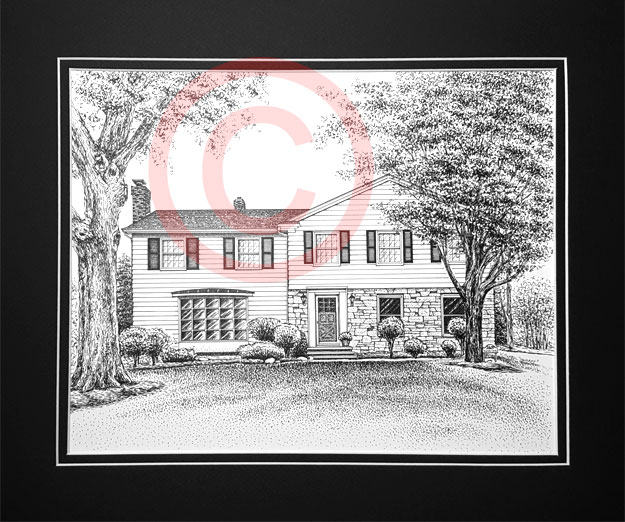 Once final, the drawing is mounted on foam core, double-matted, and prepared for shipping!